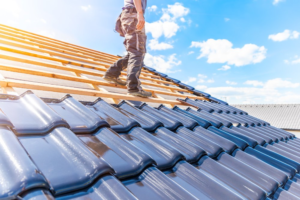
Siding Repair is a transformative process that can enhance the beauty of your home. It can also protect your investment and prevent costly repairs down the road.
A professional can repair minor cracks and holes using vinyl patch kits and caulk. This method is quick and easy. It can be done in a matter of minutes.
Whether caused by storms or simply the natural wear and tear of your siding, cracks in wood siding are a common problem. They can weaken the structure of your home and lead to further problems if not addressed early on. You can often fix cracks in wood siding yourself with a few simple tools. However, if the damage is extensive, you may need to call professional professionals.
You can use a caulking gun to apply a bead of waterproof caulk around the damaged area for small divots and holes less than an inch in size. You can then smooth the caulk with a putty knife and wait for it to dry. Afterward, you can paint over the repair to help it blend in with the surrounding siding.
If the crack is larger, you’ll need to remove it and inspect it. You may discover that the crack is due to poorly installed building paper and flashings or that insects are causing the damage. In either case, you’ll need to consult a professional contractor to make the proper repairs and prevent further problems.
You can also attempt to repair a cracked piece of vinyl siding yourself. First, mix a mild detergent solution in clean water and dampen a cloth with it. Clean the cracked surface of your siding, being careful not to get any solution on uncracked areas of your siding. Then, rinse the surface of your siding to remove any soap solution that may have accumulated.
Once the crack is cleaned, you can fill it using exterior filler, such as DAP Platinum Patch Advanced Exterior Filler. Stir the filler before applying it to the damaged area and use a plastic putty knife to spread it out. After it dries, sand the patched area lightly with 220-grit paper. Finally, wipe the patch clean and prime it with Zinsser Bulls Eye 1-2-3 Primer.
When you’re ready to replace the damaged panel, you’ll need to cut a new piece of vinyl. Measure the length and width of the damaged panel to ensure that the replacement will be a perfect fit. Then, cut a new panel that’s four inches wider than the existing one to allow for proper overlap.
Holes
Holes in siding aren’t just unsightly, but they also let moisture leak into your walls, which can lead to rot and other problems. Luckily, most holes can be repaired with a bit of caulk and paint.
Before you start, make sure the area around the hole is clean. Use a damp cloth or brush to remove any dirt or loose debris, as this will help ensure the patch adheres properly. Also, make sure you’re using high-quality products meant for this purpose. Low-grade materials could wear out quickly or look cheap.
For small divots and holes less than an inch in size, you can usually repair them in a matter of minutes by simply loading a caulking gun with waterproof caulk and applying a small bead to the damaged area. Then smooth it out with a putty knife and wait for it to dry before painting the siding to match.
To fix larger holes or cracks, you’ll need to use a vinyl siding patch kit. These kits include instructions, so follow them closely to ensure the patch adheres properly and blends in with the surrounding vinyl. You’ll want to ensure the patch is completely dry before you attempt to paint it, as this will help it last longer and keep the moisture out of your home.
If you’re unable to repair a hole or crack on your own, a professional can help. They’ll carefully trim any grass or bushes near the affected area and remove any items in the way of easy access to your walls. This will prevent damage to your belongings or the wall itself and allow the crew to work more efficiently.
If you have damaged siding, it’s important to get it repaired as soon as possible. It prolongs the lifespan of your siding, helps prevent pest infestations, and can even save you money on insurance costs. Plus, keeping your siding in good condition adds to the curb appeal of your home and maintains its value. So if you’re seeing signs of cracks or other damage, contact us today! We can provide you with an estimate and start making your siding look brand new again.
Rotting
Wood rot happens when your siding’s under layer becomes saturated with moisture, causing the wood fibers to break down. When the problem is left untreated, it can lead to serious damage and even structural damage to your home.
Rotting is most commonly caused by excessive moisture in the home, but can also be the result of a poorly designed roof or gutter system, overflowing rain gutters, clogged gutter downspouts, and more. In some cases, bushes and other landscaping come into contact with your home’s siding, which traps the moisture against it and allows the rot to progress slowly over time.
If you notice your siding is warped, distorted, or damaged in any other way, it’s important to have the area professionally inspected by a siding expert right away. This helps to ensure that the problem is addressed quickly before it becomes more costly and time consuming to repair.
In many cases, a small section of the affected wood can be repaired with a simple patch job and a wood preservative. However, it’s best to have a professional inspect the affected area and determine if the entire board needs to be replaced or if the existing wood can be salvaged.
Once the damaged area has been patched, you’ll need to apply a wood preservative to the exposed areas of the wood to slow down further decay and keep moisture from seeping into the rest of your siding. Once this has dried, you can sand the patch and apply fresh paint or stain to match your existing color.
It’s important to have your siding inspected regularly, particularly in spring and fall or after severe weather hits. Regular inspections can help catch problems before they become more costly to repair, and prevent them from occurring in the first place. Make sure to look for signs of moisture penetration, such as rotting, mold, or bubbling paint, and remember to clean and caulk frequently to extend the lifespan of your siding.
Water Damage
In addition to the more visible cracks and holes, homeowners should look for signs of water damage that aren’t immediately apparent. Paint that bubbles or peels is often a sign of moisture buildup, as is wallpaper that starts to wrinkle or lift. The same goes for soft drywall, which suggests that the walls have been absorbing moisture for some time and may also be impacting insulation and framing behind it.
Another sign of moisture infiltration is the presence of mildew or mold. If spotted early, these issues can be remedied with a thorough cleaning and a good coat of paint, but it’s best to hire a professional if the damage is extensive or if you suspect that the mold or mildew are spreading to other areas of your home.
When water damage is left unchecked, it can lead to rot and other structural problems that will require expensive replacement. It’s important to check siding for these warning signs on a regular basis, especially after severe weather. This will give you an opportunity to repair the problem before it becomes a major project that could cost thousands of dollars.
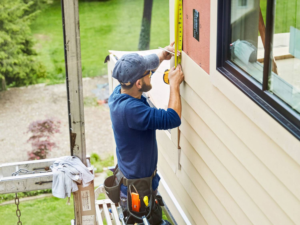
The first step in repairing siding is to gather the necessary tools and materials. These might include a pry bar, hammer, nails, utility knife, and measuring tape. You’ll also need vinyl patch kits, replacement siding boards, caulking, and color-matching exterior paint. Once you’ve gathered all of the materials, remove any old pieces of siding from the area and dispose of them properly.
Start by gently lifting the edges of the damaged section and loosening the nails. If you notice that the nails are sunken or protruding, this means that the siding has absorbed moisture and has started to swell.
Once the nails are removed, carefully pry the piece of siding away from the house and cut a new replacement from the patch kit. Be sure to measure the piece of replacement siding before cutting it so that it is the exact size and shape of the damaged section. Once the replacement piece is in place, nail it down with a hammer and galvanized nails.